Magento integration with Deployteq
Setting up the connection
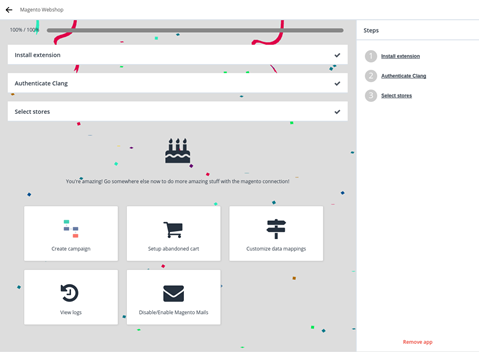
Go to the Deployteq Store module in the left-hand menu in Deployteq. Here you will find all the apps available to you. Select Magento from the list.
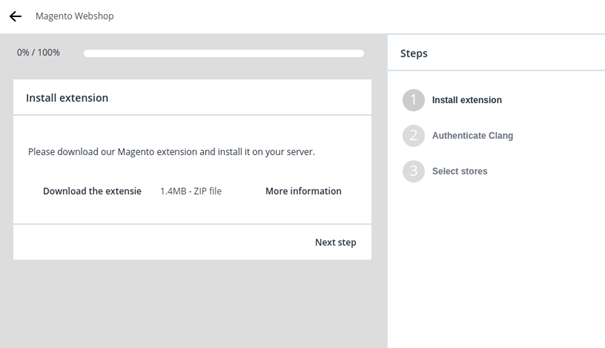
Set up the first connection by completing the three-step wizard. Start by selecting and installing the Deployteq extension in the Magento Marketplace.
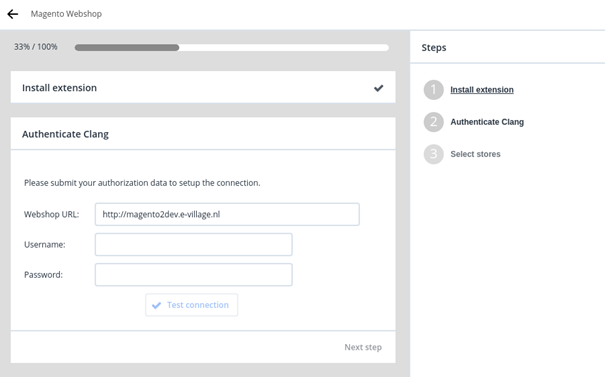
Once you have done so, creating a new user for the Deployteq connector is the best way to set up the connection. You could, of course, use an existing user, but we advise you to create a new user in order to keep the various processes separate. Once you have entered the credentials in the second step, you can test the connection.
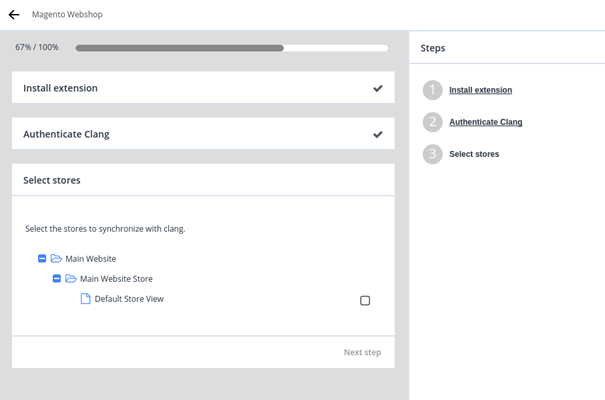
Lastly, you can select the shops that you want to integrate into this brand in Deployteq. If you have a multi-language site/shop and both a Dutch and English brand, only select the shop that you want to integrate with the Dutch brand. It is possible to use several languages in Deployteq using localIDs and storeIDs. We will return to this later.
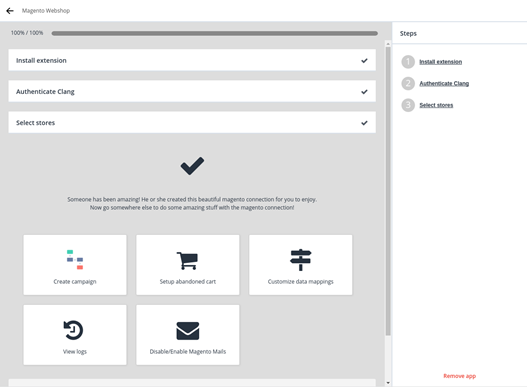
Congratulations! You are now the owner of a connection between Deployteq and your Magento 2 online store.
You can now:
- create campaigns
- enable and disable Magento e-mails
- modify the default data mappings
- view the logs of calls that have already been sent set up the abandoned cart (bèta).
Modifying your configuration
If you want to modify your data mappings, enable or disable the e-mails sent from Magento, or view the logs, go back to the Deployteq store.
Your installed apps are shown at the top. Choose the Magento app to make modifications. You will go directly to the last step in the wizard which contains the options to be modified. Whenever we mention going to the Magento settings in the rest of this manual, this is what we mean.
Creating campaigns
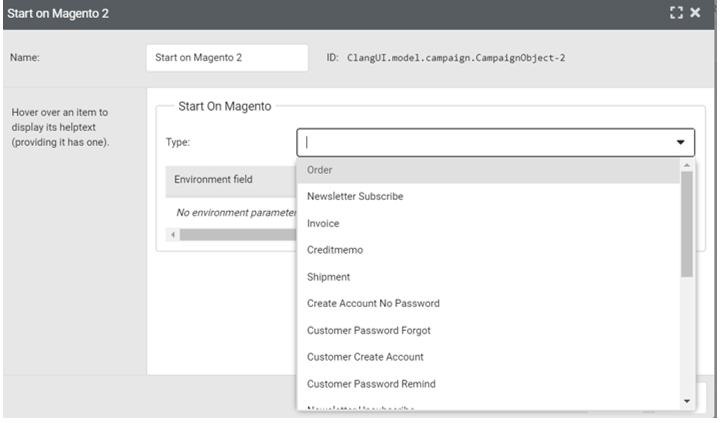
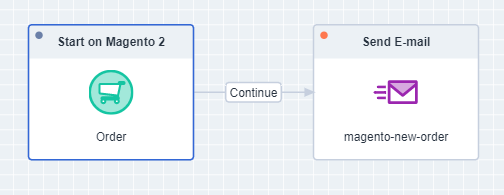
The first step has now set up a data model for the customer and order data. This data can be sent to your Deployteq campaigns to send an order confirmation, for example, or to confirm a newsletter subscription. To start a campaign with a Magento promotion, select the object ‘Start on Magento’.
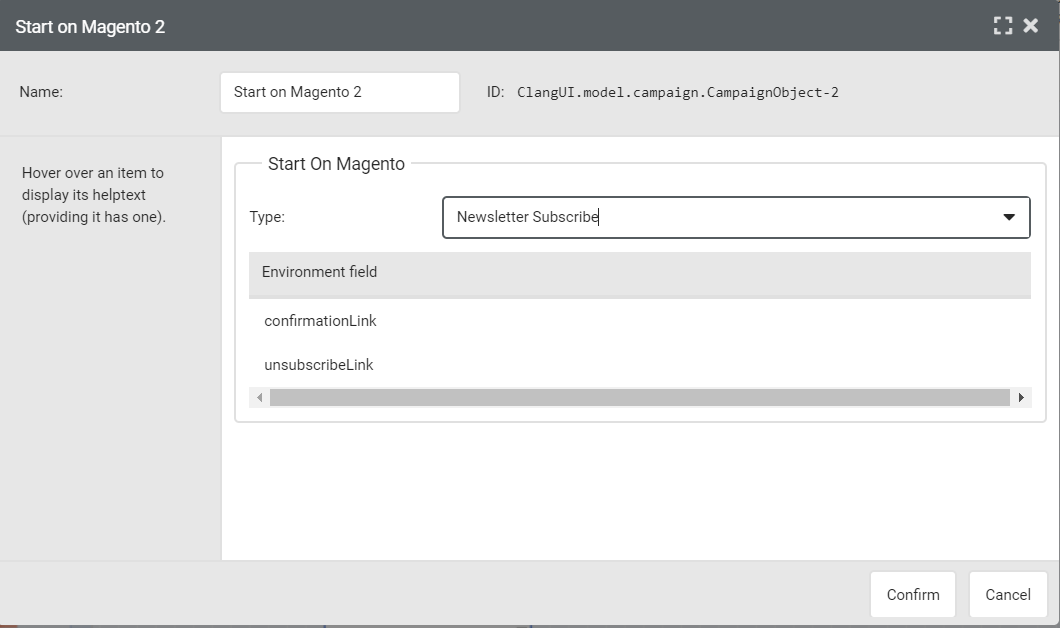
In this object you can configure which flow you want to start here by selecting the required type.
Once you have selected the type, the configured environment fields will also become available as soon as you confirm. Examples include StoreID and the formatted address with Order.
The simplest set-up is to send out an e-mail immediately afterwards. You can create variations in the e-mail using storeIDs to send out the right language or branding. For more information on this, Click here.
As all the data is already saved to the customer and into their data model, you can use their customer details and order details as you are used to doing in Deployteq to create some fantastic e-mails.
Enabling and disabling Magento e-mails
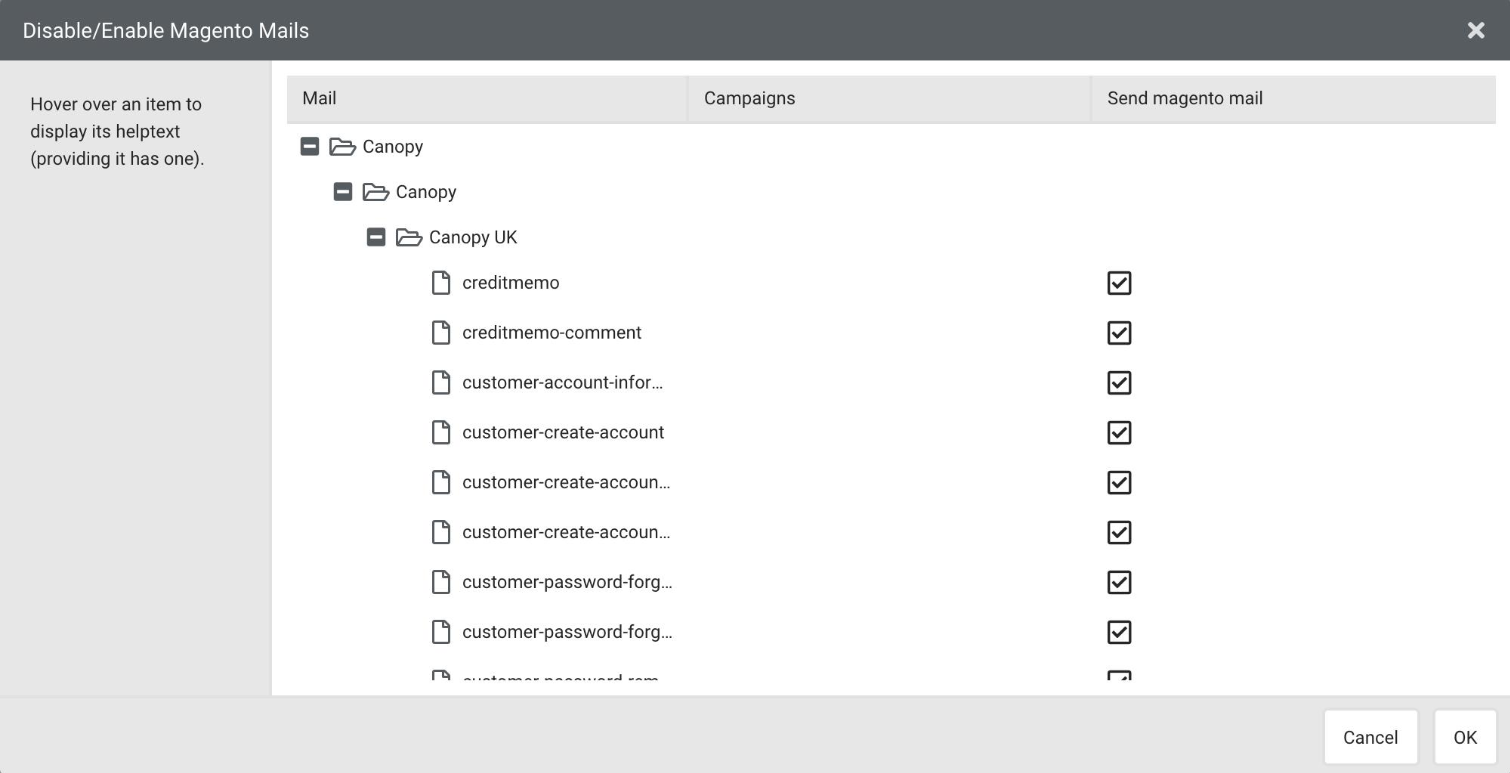
For testing purposes, you can start with the override campaign. When you want to go live, you can return to the Magento settings and select ‘Disable/enable Magento e-mails’. This setting enables you to choose which e-mails you want to send from Magento and which you don’t. All e-mails are sent from Magento by default, but if you are happy with your Deployteq e-mails, you can turn this off.
Modifying data mappings
A basic mapping is also installed for you during the installation. However, we can understand that you may have customized product and customer data that you want to have available as well. It is therefore possible to modify the data mappings. The easiest way to modify a mapping is by first creating a call. When performing tests with the Magento 2 test environment, first place an order before going to the mapping section. This will make it much simpler for you.
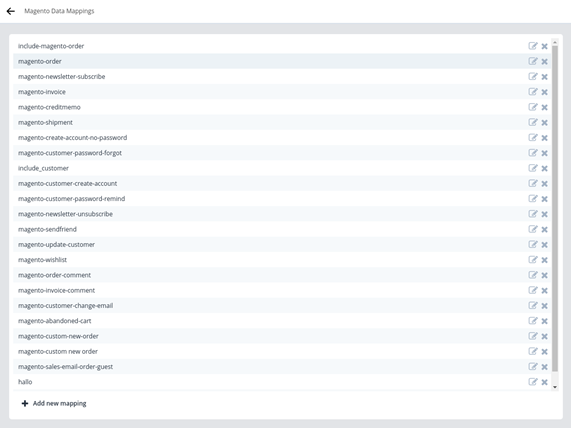
Go to the Magento settings and select ‘Customize data mappings’. You will see an overview of all the different mappings that have already been configured for your shop.
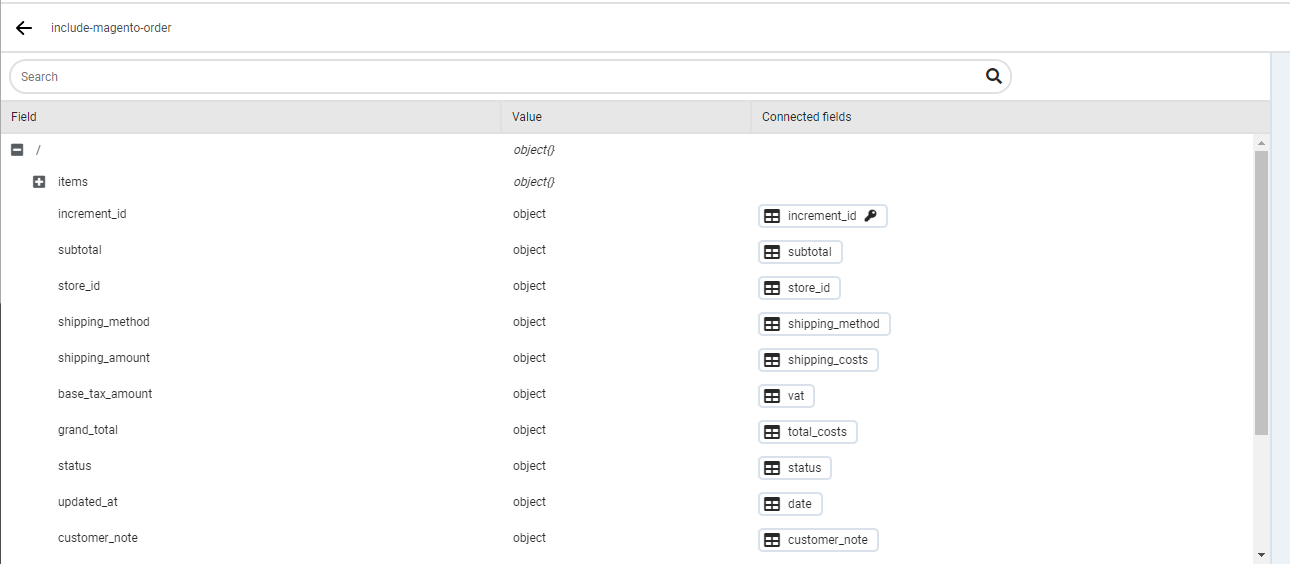
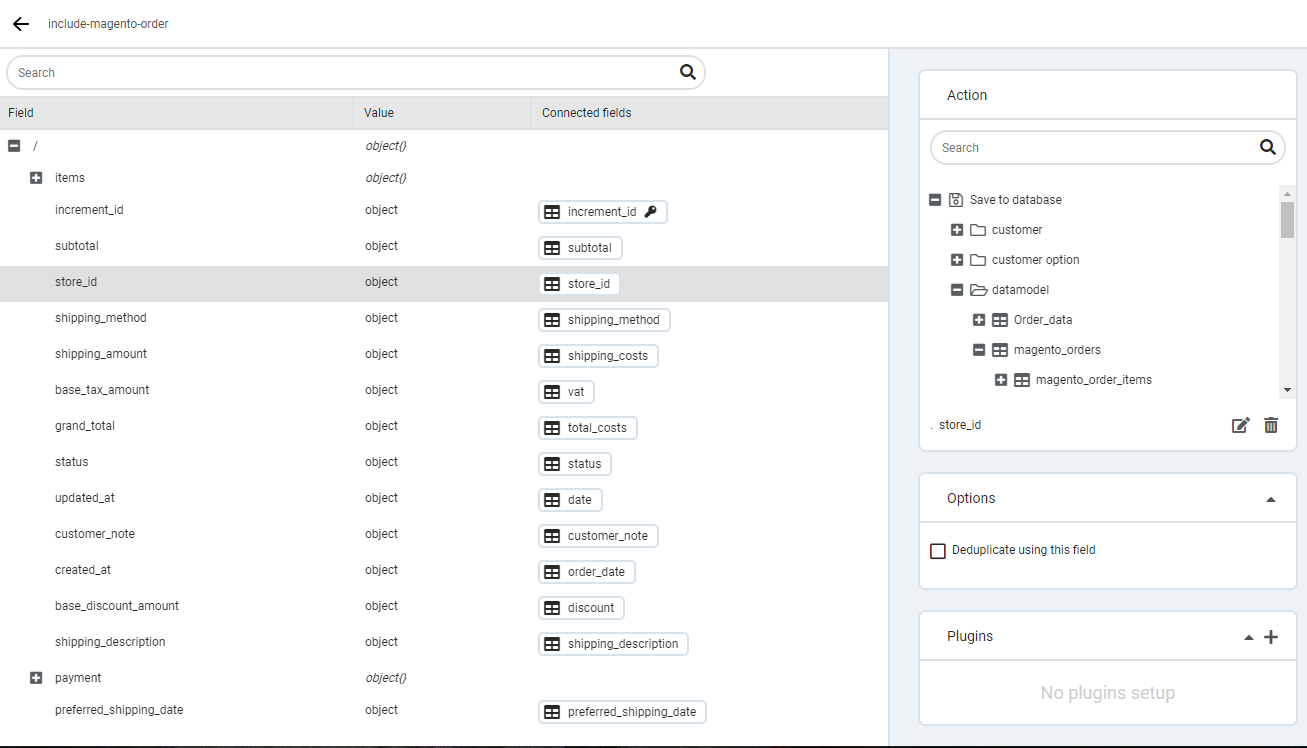
Please note that Deployteq has added ‘include’ mappings. You can regard these as mapping templates that are used in several calls. If, for example, you want to change customer data, it would be best to start with the include-customer layout. This layout is used in several calls, such as newsletter subscriptions, order confirmations, and send confirmations. The same applies to include-order for the data in the data model.
When you select one of the mappings, you will receive the data that was sent in the last call from Magento to Deployteq. Here you can search for various Magento fields and configure them. The fields that have already been mapped to Deployteq fields have the Deployteq field displayed next to them in the ‘Connected fields’ column.
To modify a mapped field, select the field. You will see an overview of the Deployteq fields on the right-hand side. These could be customer fields, such as name, e-mail, and address. They could also be your own customer option fields, such as language or source and ordered items. Finally, they could also be environments that you can use for the flow of a campaign or a mailing in the campaign. You can specify the name of this environment in the Options frame.
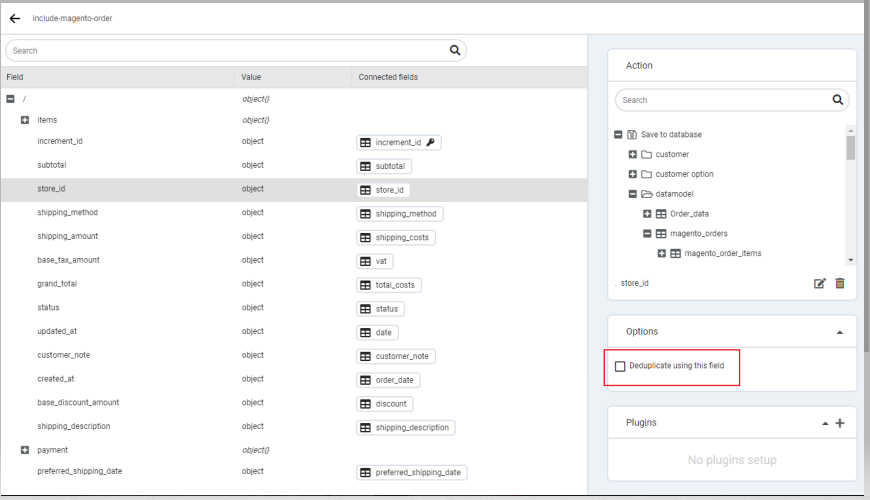
When you receive data from an external system, the deduplication options are very important! Make sure that you always have a deduplication key configured. By default, this is the e-mail address in the Magento settings. This can also be selected in the second frame on the right-hand side, under Options.
Viewing logs
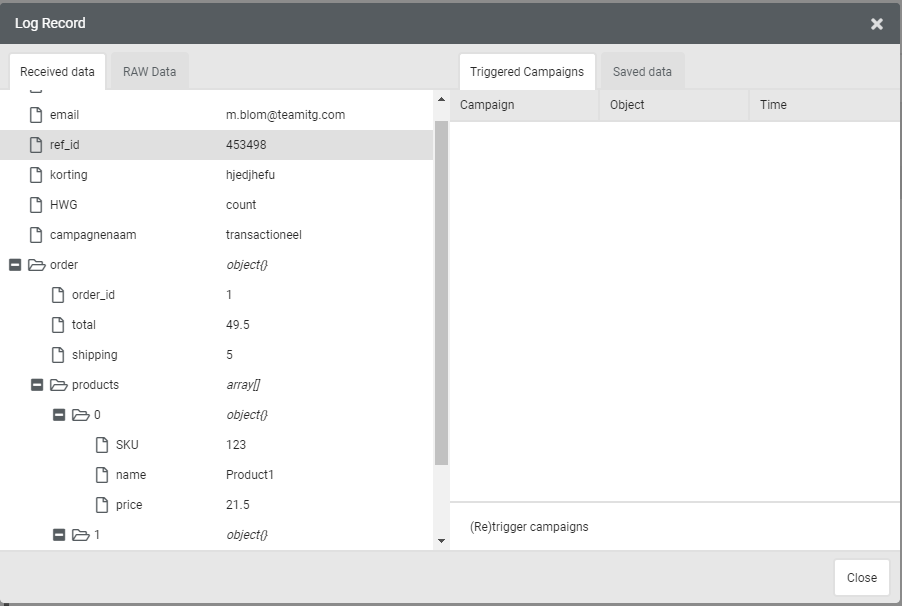
If you want to see which calls Magento has sent to Deployteq, which details have been saved, or which campaigns have been triggered, you can view the logs. Go to the Magento settings and click on the ‘View logs’ button. This button is also displayed at the top right when you edit mappings.
When you enter the logs from the main settings screen, you can see all the calls sent from Magento in chronological order.
However, when you select the Magento order mapping and then go to the logs, you will only see those calls related to the orders.
When setting up or testing campaigns and e-mails, you won’t want to place an order every time to see whether your e-mail or flow has improved. The last column in the logs will help you with this.
From left to right:
1. You can save the data again, e.g. if you have made changes to the mappings.
2. You can trigger the campaign again when you have made changes to the flow or e-mail with the saved data for this call.
3. You can view the details of the call, which data Magento has sent to Deployteq, what has been saved, and what campaign has been triggered and when.
Technical manual
Magento-specific Smarty codes
Smarty is a language that you can use to implement intelligence in your Deployteq e-mails. Most Smarty codes can be found at smarty.net, but we have also created specific Smarty codes for Deployteq. This part of the manual is intended for developers and technical people. We only recommend reading further if you are familiar with Smarty of have some knowledge of JavaScript.
Base shop URL
If you want to use your base URL flexibly, you can use the base shop URL smarty. Only the shopID needs to be supplied, which can also be configured flexibly, for example by placing it in a property.
{{$magento.stores[1].base_url}}
// or flexible storeID
{{$magento.stores[$store].base_url}}
and the base URL for images:
{{$magento.stores[1].base_media_url}}Retrieving product data from Magento
When you create a newsletter and want to include product data in the e-mail, you can retrieve the data from Magento automatically. You only have to enter the storeID and SKU to obtain the image, name, price, etc
{{$magento.stores[1].products['SKU'].name}}
{{$magento.stores[1].products['SKU'].url}}
and the base URL for images:
<pre>
{{$magento.stores[1].products['SKU'][':array']|print_r}}
</pre>
In Magento, you can have various custom_attributes in your products. However, the reference they produce is not easy to incorporate in your e-mail. To avoid all sorts of ‘if’ statements relating to descriptions and values, we have built the following filter function:
{{$magento.stores[1].products['SKU'].custom_attributes[':filter(attribute_code=description)'][0].value|print_r}}If you want to update unsubscribes in Magento, you can use the code below:
{{$magento.stores[1].personal_unsubscribe_url}}